How to Animate a Picture: Your Ultimate Guide to Making Photos Move
Learn how to animate a picture with simple steps, AI tools, and parallax tricks to make your images move and grab attention.
Ever looked at a photo and wished it could do... more? Like, make your friend's epic face-plant at the wedding a looping GIF for eternity? If you've ever wanted to add a little spark of life to a static image, you're in the right place. Animating a picture is all about adding motion to a still photo, and it can be as simple as creating a looping GIF in a few minutes or as complex as a cinematic parallax effect that pulls you right into the scene.
These days, you don’t need to be a professional animator with a beret and a fancy art degree to bring your photos to life. Thanks to a mix of classic software and some seriously powerful AI tools (like our favorite, Zemith), anyone can do it.
Why Bother Animating a Picture?
Let's face it, our feeds are flooded with static images. Knowing how to animate a picture is a huge advantage because it turns a quick glance into a moment of genuine engagement. Think about the difference between a flat photo of a landscape and one where the clouds are actually drifting across the sky. Instantly, the image tells a much bigger story.
This isn’t just a neat party trick; it's a smart move. For marketers, animated visuals can seriously crank up engagement on social media. For creators, it adds a polished, professional feel that helps your work pop. And even if it's just for fun, it's an amazing way to inject new energy into your favorite memories.
The Magic of Motion
Think about the posts that make you stop scrolling. I’d bet most of them have some kind of movement. Our eyes are just wired that way—we’re instinctively drawn to motion. Okay, so animating a picture of your brunch probably isn't a life-or-death situation, but the core principle is the same!
The real goal here is to create an illusion of life. You're not just making a picture move; you're adding emotion and atmosphere. A subtle animation can turn a simple portrait into a quiet, thoughtful moment.
Consider this guide your roadmap. We're going to skip the overly technical jargon and get right to the methods that real creators use every day.
- Social Media: Make thumb-stopping GIFs and short videos that get people to hit that share button.
- Websites: Design a hero image that grabs a visitor's attention the second they land on your page.
- Digital Art: Push your illustrations and photos into a whole new dynamic dimension.
The best part is you don't need a massive budget or a degree in animation to get started. Many new platforms offer an that makes this whole process way easier. And with tools like Zemith's creative suite, you can get fantastic results without a crazy-steep learning curve.
By the way, if you're looking to create images from scratch before you animate them, you should check out our guide on the . Now, let’s get into it.
Let AI Do the Heavy Lifting for You
Forget about spending hours meticulously masking layers or nudging keyframes back and forth. There’s a much faster way to bring your images to life, and it's all driven by artificial intelligence. You can now learn how to animate a picture using simple text prompts, turning a static photo into a moving scene in just a few minutes. This isn't some far-off concept; it's a practical tool that creators are using right now.
AI animation tools are designed to understand the content of your picture and apply motion based on what you tell them to do. It’s a completely different way of working—one that feels less like tedious labor and more like you're directing a scene. For anyone creating content, this is a huge deal, opening up the door to produce eye-catching visuals without the steep learning curve. The best AI picture animators can save you hours of work.
This isn't just a niche trick, either. The animation industry is booming. The global market, valued at USD 462.32 billion in 2025, is on track to nearly double to a staggering USD 953.31 billion by 2035. That kind of growth tells you just how important moving visuals are, and AI is simply making them accessible to everyone.
Writing Prompts That Actually Work
The real magic behind getting great results from AI animation is all in the prompt. If you just type in a vague command like "make it move," you're going to get something generic, and frankly, a little weird.
You have to think like a director. Be specific. Be descriptive. You’re giving instructions to an artist—it just happens to be a digital one.
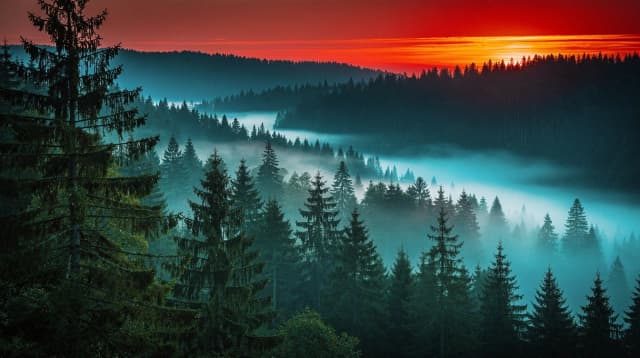
Instead of a generic "animate the forest," try painting a picture with your words:
- "Make the leaves on the trees rustle gently in a soft breeze."
- "Create a slow, subtle zoom into the center of the path."
- "Add a swirling mist that drifts slowly across the forest floor."
See the difference? Specificity is your best friend here. The more detail you pack into your prompt about the type of movement, the speed, and the overall mood, the closer the final animation will be to what you imagined.
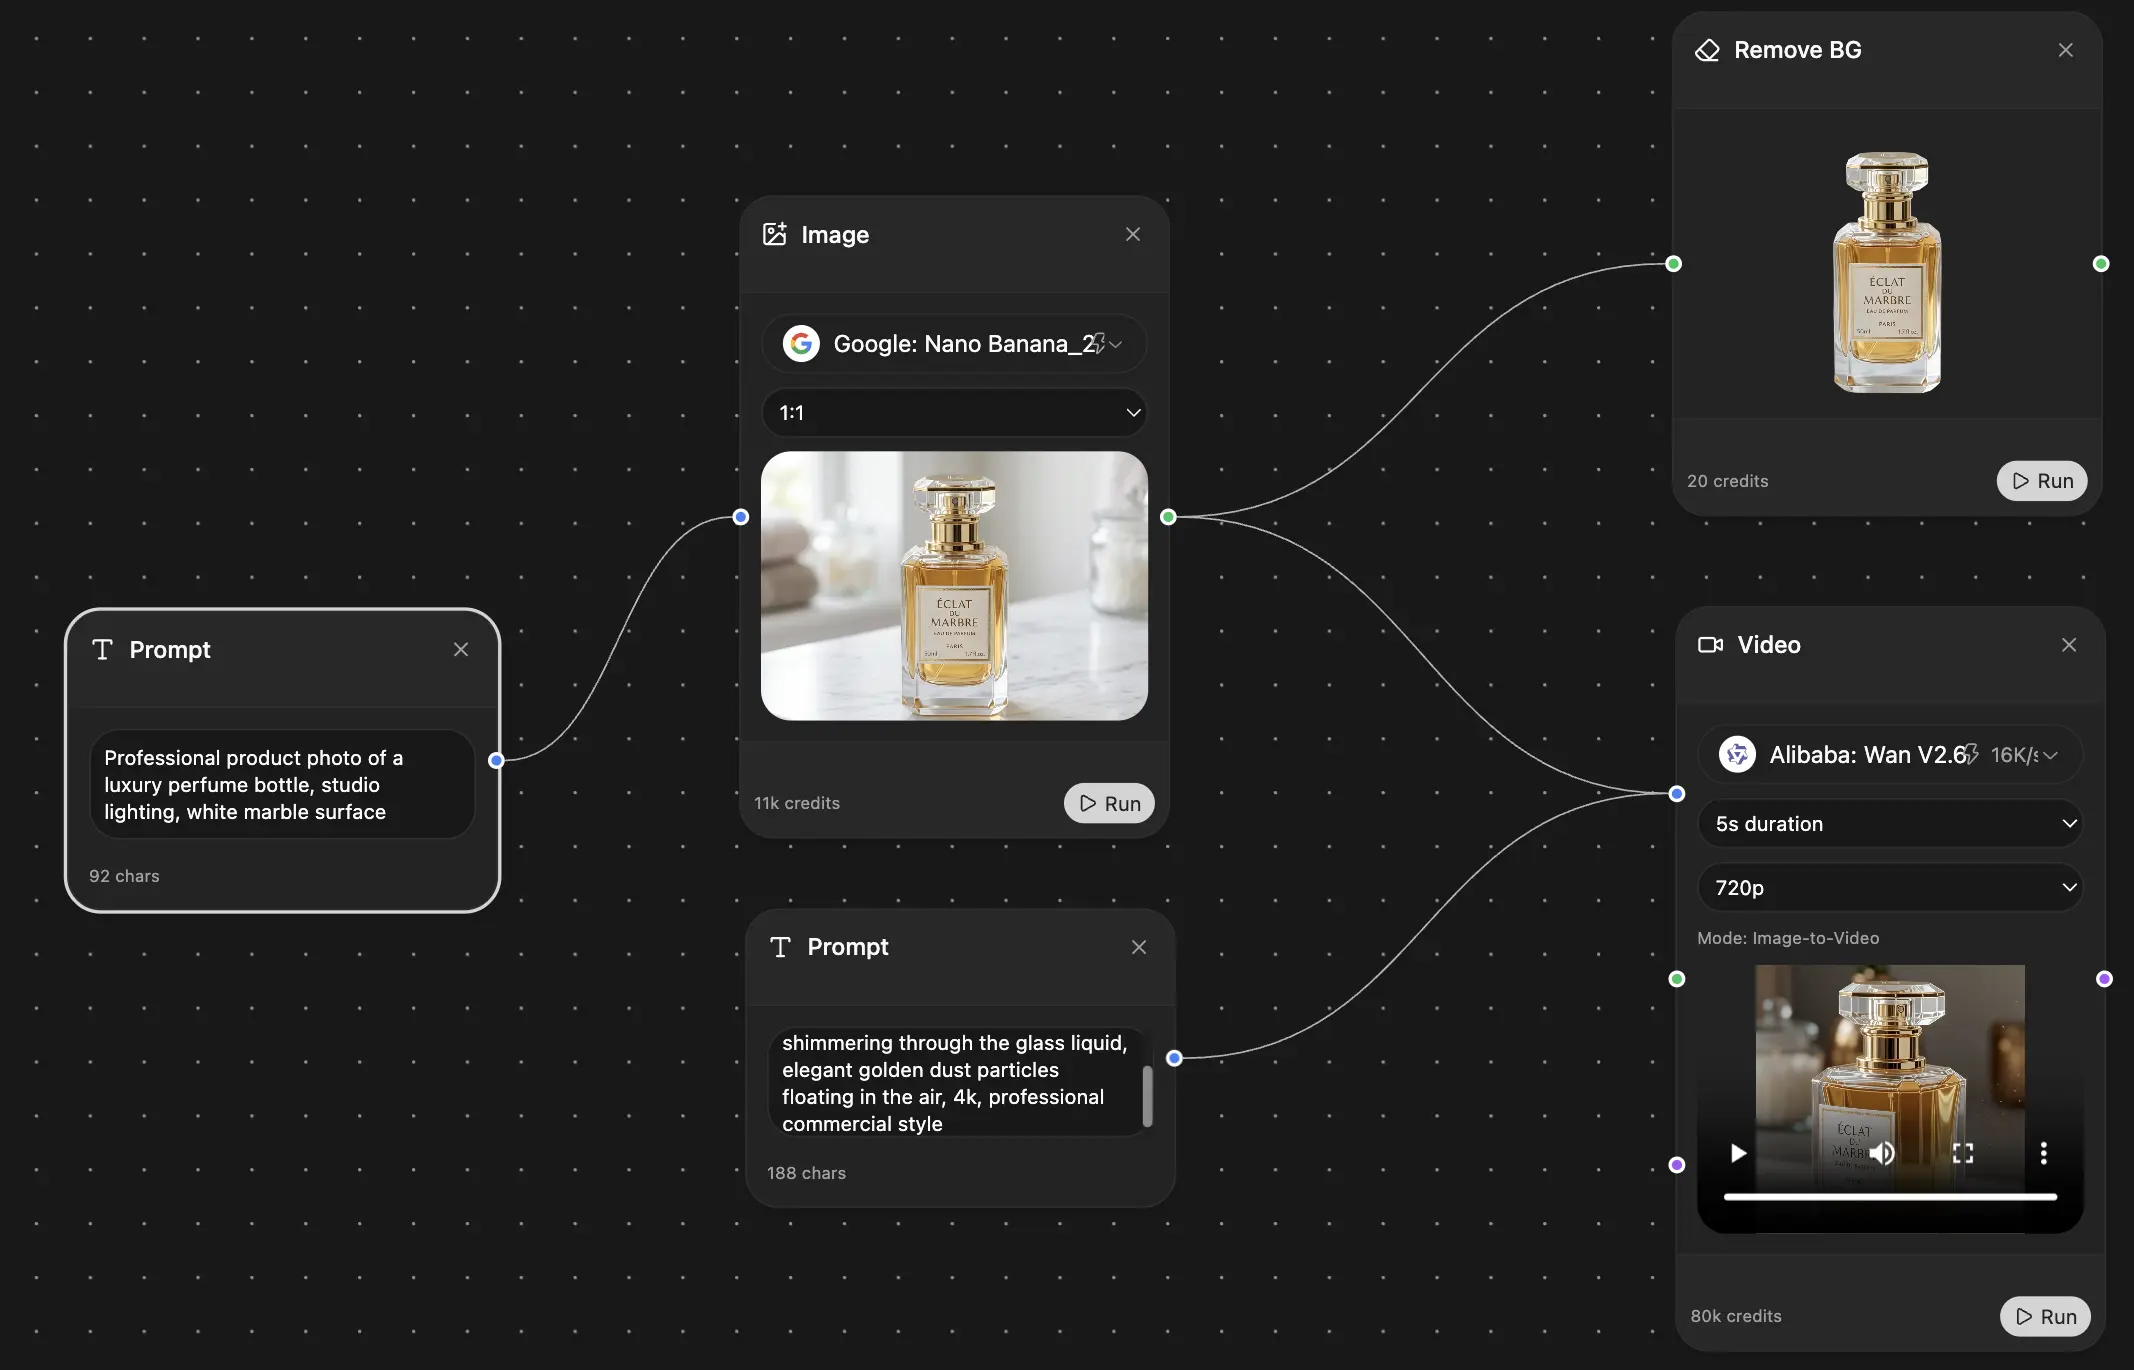
Here’s a peek at the Zemith interface, where you'd type in these kinds of prompts.
The clean layout keeps things simple, letting you focus entirely on your creative instructions. That's the beauty of it – you tell Zemith what to do, and it handles the grunt work.
A Real-World Example with Zemith
Let's walk through a quick, practical scenario. Say you have a gorgeous photo of a waterfall tucked away in a lush jungle, and you want to make it pop for a social media post. Using a tool like Zemith, this process is dead simple.
First, you upload your picture. The AI immediately gets to work, identifying all the different elements—the water, the trees, the sky. From there, you just need to tell it what to do with a text prompt.
Pro Tip: Don't be afraid to combine different types of motion in a single prompt. For example: "Make the waterfall cascade down the rocks realistically, while the surrounding ferns sway gently." This creates a much more dynamic and believable scene.
The AI then generates the animation, creating a video where the water flows naturally and the plants have a subtle, lifelike movement. You didn't have to spend time manually selecting the water or painstakingly animating every single leaf. The AI handled all the heavy lifting, freeing you up to focus on the creative vision. You can learn more about how an can make this workflow even smoother.
The Power of AI Model Integration
What makes a platform like Zemith so effective is its ability to tap into different AI models. For example, you could use a model like Stability Diffusion not just to animate what's already there, but to add entirely new elements to your scene.
Let's go back to that forest picture. After you get the trees moving, you could use a second prompt to add some atmosphere:
- Prompt 1 (Animation): "Make the branches of the pine trees sway gently, as if in a light wind."
- Prompt 2 (Generative Element): "Add faint, golden sunbeams piercing through the canopy from the top left."
This layered approach lets you build complex, beautiful animations that, not too long ago, would have required some serious skills in a program like After Effects. You're basically collaborating with the AI, building your scene piece by piece. For more ideas on getting the most out of these tools, check out our deep dive into the best features.
This technology isn't about replacing artists. It's about giving them superpowers. AI tools like Zemith take care of the tedious, time-sucking tasks, which gives you the freedom to experiment and bring stunning visuals to life faster than ever. You’re still the director; AI is just your new, incredibly efficient animation team.
Create Depth and Drama with the Parallax Effect
Ready to kick things up a notch? If you really want to learn how to animate a picture in a way that makes people stop scrolling and say, "Whoa, how did they do that?" then you need to get familiar with the parallax effect.
This technique, often called 2.5D animation, creates a stunning illusion of depth by making different parts of your image move at different speeds. It’s the secret sauce behind countless cinematic intros, slick website hero images, and videos that just look professional.
It sounds complex, but the idea is actually pretty intuitive. Think about looking out a car window. The guardrail right beside you flies by in a blur, the houses a little further away move slower, and the mountains on the horizon barely seem to move at all. That’s parallax in a nutshell. We're just faking that same natural phenomenon within a single photo.
The result is a dynamic, immersive experience that pulls the viewer right into the scene. It's perfect for adding a touch of drama to a landscape photo, creating an engaging product shot, or just giving your creative projects an incredibly polished feel. Don't worry, you don't need a Hollywood budget—just a bit of patience and a good game plan.
Preparation Is Everything
Let me be straight with you: the success of any parallax animation is 90% preparation. Getting your image ready before you even think about movement is the most crucial part. If you nail this, the rest of the process is surprisingly smooth. If you rush it, you'll be pulling your hair out later. Trust me on this one.
Your mission, should you choose to accept it, is to slice your image into distinct layers. Think of it like one of those old pop-up books. You need separate pieces for your foreground, midground, and background.
- Foreground: These are the elements closest to the "camera." It could be a person standing in front of a building, a tree branch hanging in the frame, or a product sitting on a table.
- Midground: This is generally where your main subject lives. Think of the building itself or the central cluster of trees in a forest.
- Background: This is everything way in the back—the sky, distant mountains, a blurry cityscape. You get the idea.
You'll need an image editor like or a free alternative like for this surgery. Using selection tools (the Pen Tool is my go-to for precision), you'll carefully cut out each element and pop it onto its own transparent layer. The real magic, though, is using tools like Content-Aware Fill to paint in the gaps you just created. This step is vital for preventing weird empty spots from showing up when your layers start to move.
Stepping Into the Third Dimension
Once your layers are prepped and saved as a layered file (like a .PSD), it's time to bring them into an animation program. My weapon of choice is . This is where your flat 2D layers get a new lease on life in a 3D space.
First things first, you'll import your layered file and arrange the layers in 3D. You'll literally push the background layer further away, keep the midground in the middle, and pull the foreground layer closer to you. By adjusting their "Z-position," you're creating actual, measurable distance between them in the software.
With your scene built, you then create a virtual camera. This camera is your eye. By animating the camera's position—moving it left, right, up, down, or pushing it forward—you generate the parallax motion. Because your layers are now sitting at different depths, the foreground will naturally move much faster than the distant background, creating that beautiful, realistic sense of depth.
Pro Tip: Keep your camera movements slow and steady. A gentle, subtle drift is almost always more effective and professional-looking than a fast, jerky motion. The goal is to add atmosphere, not give your viewer motion sickness.
If you’re using an AI tool like Zemith, understanding this concept of layers and depth can seriously improve your prompts. Learning to describe a scene in terms of foreground and background can lead to much more dynamic results. For a deeper dive, our guide on has some fantastic insights on this.
Of course, if you want a simpler approach, some AI tools can generate similar depth effects for you. The process often just takes a few clicks.
Here's a look at the typical AI workflow for animating a picture.
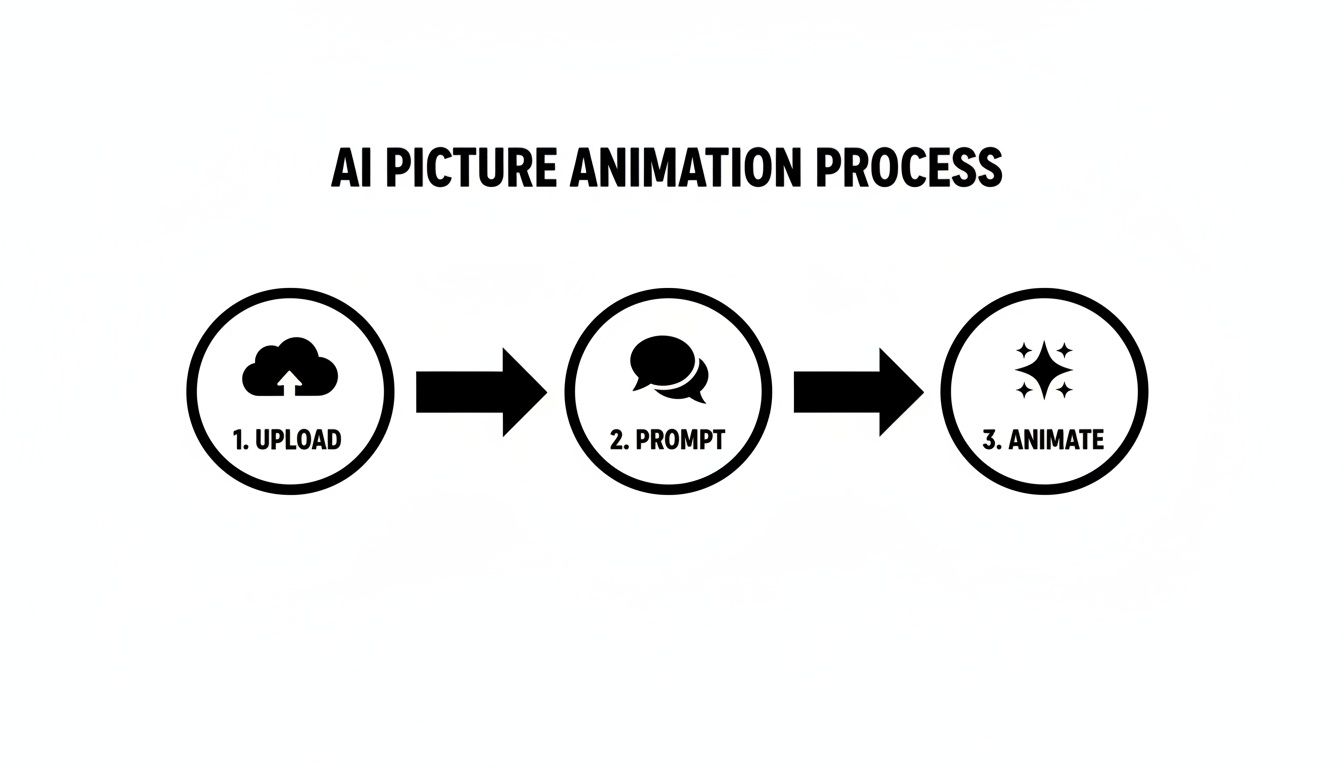
As you can see, AI-driven tools distill the whole process down to a few core actions, which is great for creators who need to work fast or are just getting started.
Adding That Extra Spark of Life
Once your main camera movement feels right, you can add small secondary animations to really sell the effect. In After Effects, the Puppet Pin Tool is an absolute game-changer for this.
Imagine you have a person in your scene. You can place pins on their joints—shoulders, elbows, head—and create a subtle animation of them breathing or slightly turning their head. Maybe you could add pins to tree branches to make them gently sway in an invisible breeze.
It's these tiny, organic movements that separate a good animation from a truly captivating one. They add a layer of life that makes the entire scene feel more real and believable.
Quick Animation Wins for Busy Creators
Look, not everyone has the time or patience to get tangled up in professional animation software. If you need to animate a picture without spending a week glued to tutorials, I get it. These methods are all about getting that scroll-stopping effect with the least amount of friction.
We're not trying to create the next Pixar short here. The real goal is to add just enough motion to make someone pause, look again, and remember what you've shared. It’s about being smart and efficient.
Think of these as your secret weapons for making visuals pop, especially on social media. They're perfect for adding a little life to your favorite photos without getting lost in the technical weeds.
The Magic of Cinemagraphs
You've definitely seen them: a photo that's almost entirely still, except for one small, looping detail. That's a cinemagraph, and it’s a brilliant way to dip your toes into animation. They have this mesmerizing, almost hypnotic quality that just pulls you in.
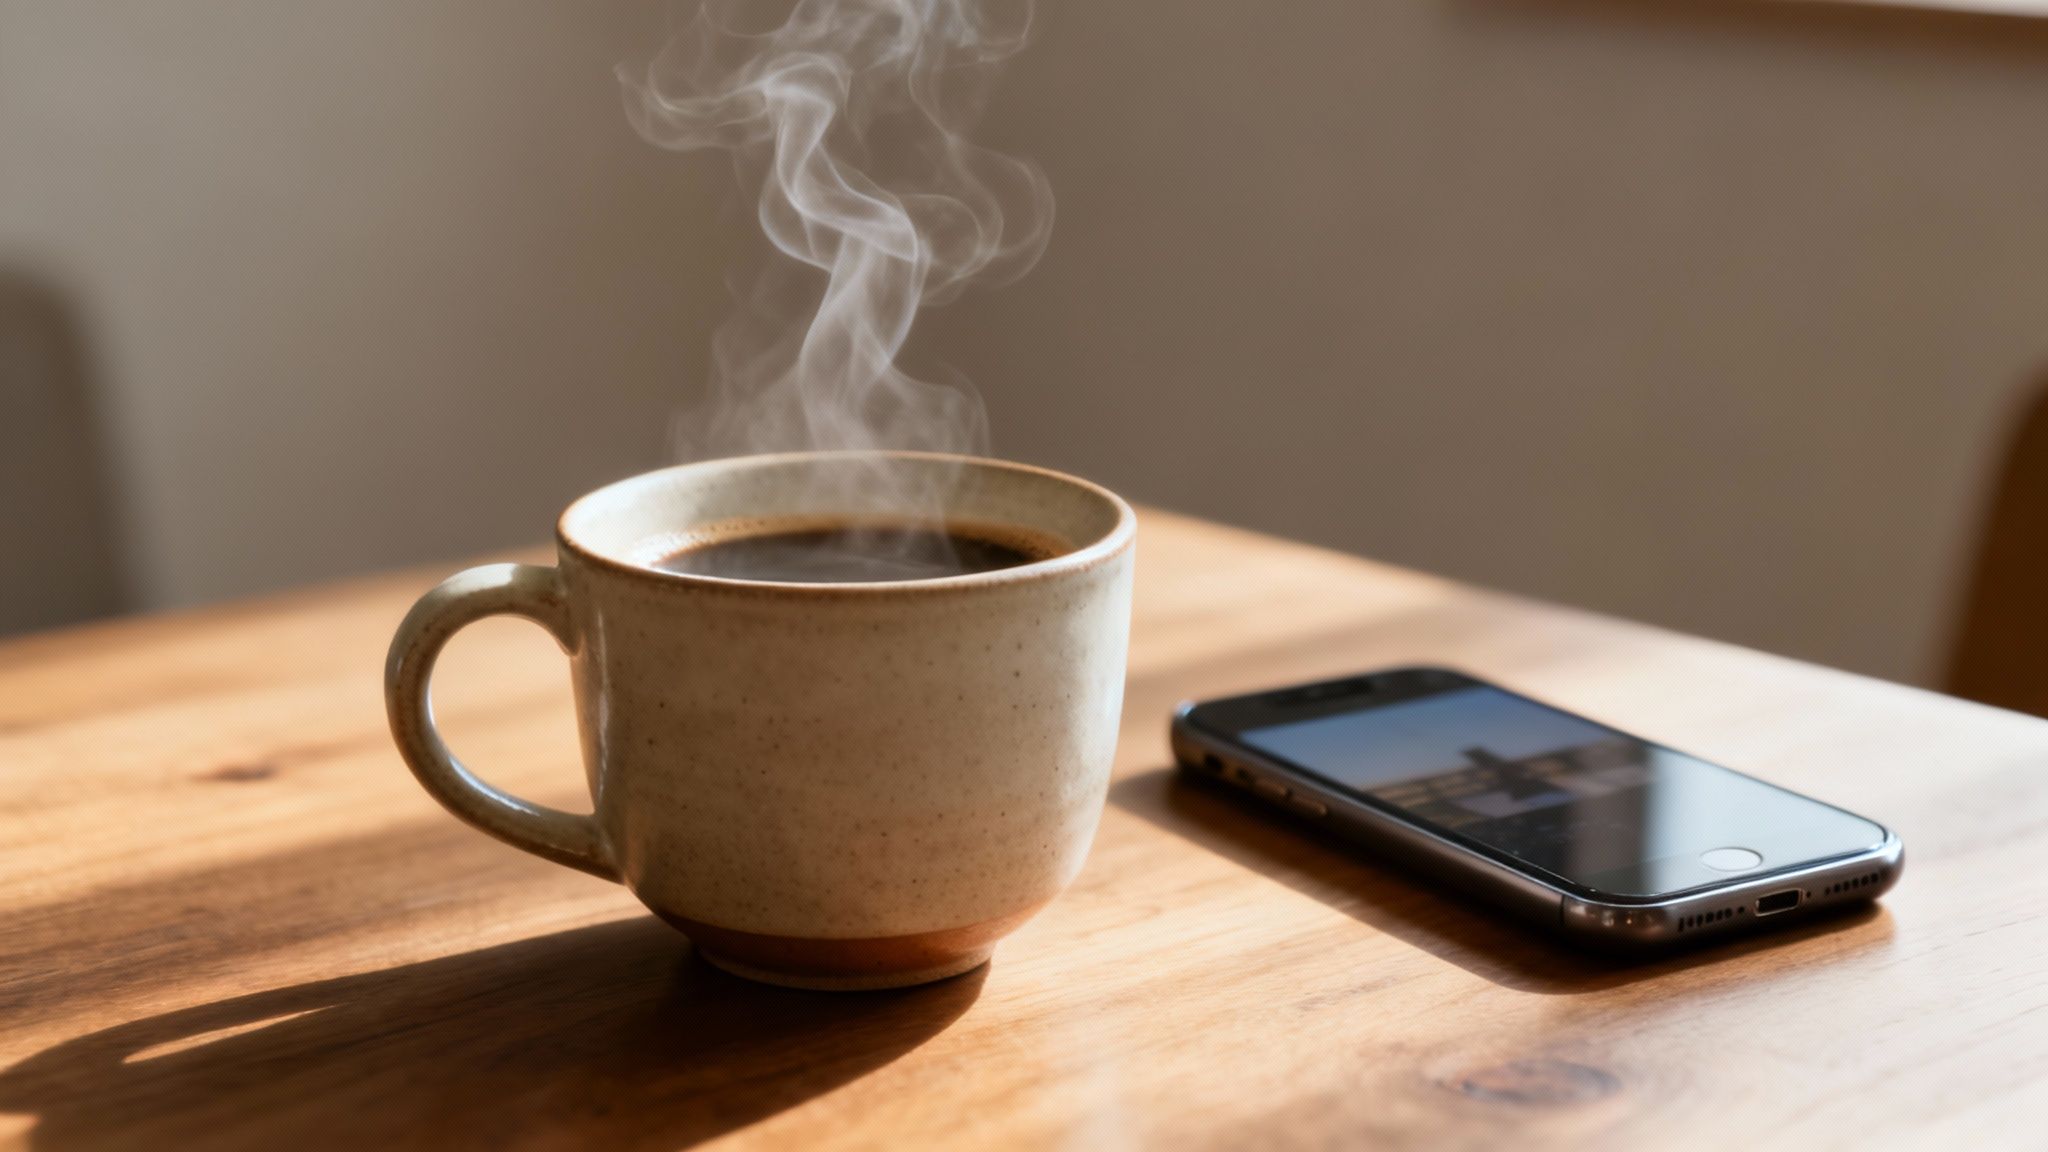
The classic example is a portrait where only the person’s hair is blowing gently in the wind, or a café scene where the only movement is the steam rising from a mug. It's subtle, it's elegant, and it's surprisingly easy to pull off.
Plenty of mobile apps are built just for this. The process is usually pretty straightforward:
- Mask the Still Areas: You essentially "paint" over the parts of the image you want to keep frozen in time.
- Define the Motion: Next, you draw arrows or paths over the area you want to bring to life, like the water or steam.
- Set the Speed: Then you can fine-tune the loop's speed to make it look natural and not too frantic.
What you end up with is a cool hybrid of a photo and a video that feels alive. It's a simple trick that delivers a huge impact, making your content feel more polished and deliberate.
Your First Animation Project: Rising Steam
Let’s walk through a quick one. Grab a photo of your morning coffee or tea. We’re going to make that steam rise in a calming, endless loop.
First, open your app of choice and import the picture. Your first move is to use the masking tool to freeze everything—the cup, the table, the background. Be really precise around the edges of the steam to avoid that weird, blurry halo effect.
Now, grab the motion or animation tool. Draw a few short, upward arrows right on the steam to show it which way to go. Don't overdo it; a few gentle paths will look far more natural than a dozen chaotic scribbles. Hit play, and watch your photo come to life. From there, you can adjust the speed until it feels just right.
This is where you can really get creative. Try the same technique on a waterfall, clouds drifting across the sky, or the flickering flame of a candle. The key is always to isolate one simple, repeatable motion.
Tapping into Photoshop's Timeline
If you're already comfortable in , you've got a powerful animation tool hiding in plain sight: the Timeline panel. While it’s capable of complex work, it’s also fantastic for creating simple frame-by-frame GIFs and gives you much more hands-on control than an automated app.
For example, say you wanted to create a subtle "breathing" effect on a portrait. You could duplicate your subject's layer. On the new layer, use the Liquify tool to very slightly expand the chest area. In the Timeline panel, you’d then create a simple two-frame animation that just flicks between the original and the expanded layer. The result is a surprisingly lifelike inhale and exhale.
This manual approach is a great way to understand the fundamentals of animation. It forces you to think about timing and how tiny changes between frames create the illusion of movement. Plus, you get to feel like an old-school animator, even if you’re just making a three-frame GIF.
To get your creative gears turning for your next project, check out our guide on using to generate some unique starting points.
Choosing Your Animation Method
Deciding which technique to use can feel overwhelming. This quick table breaks down the different approaches to help you pick the right one for your project, your schedule, and your skill level.
Ultimately, the best method is the one that fits your vision and your workflow. Don't be afraid to start with something simple like a cinemagraph and work your way up as you get more confident.
Polish and Export Your Animation Like a Pro
So, you did it. You took a static picture and actually breathed some life into it. Before you unleash that masterpiece on the world, let's talk about the final 10% that makes all the difference. This is the polishing phase—the step that turns a pretty good animation into something seriously impressive.
It’s always tempting to just hit "Export" and call it a day, right? But those final touches are what separate the rookies from the pros. We're talking about dialing in those subtle effects, smoothing out the movements, and picking the right export settings so your hard work looks just as good on someone else's screen as it does on yours.
Let's make sure your animation gets the red-carpet rollout it deserves.
Making Movement Feel Natural
One of the biggest giveaways of an amateur animation is robotic, clunky movement. In the real world, things don't just start and stop moving at a constant speed—they ramp up and slow down. This principle is called easing, and it's your secret weapon for making motion feel authentic.
Think about pushing a friend on a swing. You don't just instantly shove them to full speed. The swing starts slow, picks up momentum, and then eases to a stop at the top of its arc before changing direction. Applying "ease in" and "ease out" to your keyframes mimics this natural physics, giving your animation a graceful, believable quality.
Most animation software has a graph editor that lets you get really nerdy with these speed curves. Honestly, spend a few extra minutes here. It’s a tiny time investment for a huge leap in quality, and it'll keep your work from looking like a PowerPoint slide transition from 2004.
Adding That Extra Visual Flair
With your motion looking buttery smooth, it's time for the fun stuff: adding a little extra magic. These are the subtle visual effects that can completely elevate the mood and atmosphere of your piece.
It's all about adding small, thoughtful details. For example:
- Subtle Particle Effects: Got a cozy campfire scene? Add some faint, floating embers. A magical forest? Maybe some glowing dust motes drifting through the air. You can create these in your software or even use AI platforms like Zemith to generate effects that add a ton of depth.
- Lens Flares and Light Leaks: If you have a strong light source like the sun, adding a subtle lens flare as the "camera" moves can create a beautiful, cinematic feel. It adds a touch of realism, as if you were actually filming it with a real camera.
- Color Grading: This is the final step in really setting the mood. Are you going for a warm, nostalgic vibe? Bump up the oranges and reds. A cool, futuristic look? Lean into the blues and cyans. A consistent color grade is what ties the whole piece together.
The key here is subtlety. The goal is to enhance the scene, not to overwhelm it with a glitter bomb of special effects. Often, the best polish is the kind you feel more than you actively notice. If you find you need more canvas to add these effects, our guide on using a can be a total lifesaver.
Decoding Your Export Options
You’ve polished your animation to a shine, and now it’s time to send it out. But that export menu can look like an intimidating mess of codecs, containers, and acronyms. Let's cut through the noise with some simple, platform-specific recipes.
Getting your export settings right is crucial. A file that’s too large will just buffer forever on a website, while a file that’s too compressed will look like a pixelated mess. The whole game is finding that sweet spot between quality and file size for where your animation will live.
Here’s a quick cheat sheet for the most common formats:
For most of us, MP4 with the H.264 codec is going to be the right choice about 95% of the time. Think of it as the Swiss Army knife of video formats—it’ll play beautifully on just about every device and platform out there.
Got Questions? I've Got Answers
Alright, we've covered a lot of ground, and it's totally normal if you've still got a few things bouncing around in your head. Getting into animation can feel a bit overwhelming at first, but honestly, the hardest part is just starting.
Let's tackle some of the most common questions that pop up when people first learn to bring a photo to life.
What's the Easiest Free Way to Animate a Picture?
If you want the path of least resistance, especially if you're a complete beginner, grab a free mobile app. Seriously. Tools like or Motionleap are built for this—they're incredibly intuitive and you can get some surprisingly slick results, like cinemagraphs, done in just a few minutes on your phone.
Already have ? Don't overlook the Timeline feature. It's a fantastic way to create simple, looping GIFs without spending an extra dime. You get way more hands-on control than a simple app, but it's not nearly as complex as a dedicated video editor.
Do I Actually Have to Draw Anything?
Nope. 100% no. This is probably the biggest myth holding people back. Every single technique we've walked through here, from AI-powered tools to the 2.5D parallax effect, starts with an existing photo.
Think of yourself as a director, not an illustrator. You're adding motion to a world that already exists, not sketching one from scratch. I promise, no drawing skills needed.
How Can I Make Sure My Animation Doesn't Look… Cheesy?
This one's easy: subtlety is everything. The biggest culprit behind cheesy-looking animations is just doing too much. When the motion is too fast, too jerky, or way over the top, it just feels unnatural and, well, cheap.
Focus on small, believable movements that make the photo feel alive, not ones that scream "look at this effect!"
- Stick to natural motion: Imagine gentle wind blowing through leaves, clouds drifting slowly, or steam rising from a coffee cup.
- Slow down: A slower, more deliberate pace almost always reads as more professional and cinematic.
- Ease in and ease out: Movements in the real world don't just start and stop abruptly. Make sure your animations ramp up and slow down smoothly. It’s a small detail that makes a massive difference.
A tiny bit of well-placed motion is way more powerful than a dozen flashy, poorly executed ones. You’re just trying to add a little spark of life, not turn your photo into an action movie. But hey, if that's your vibe, go for it.
Ready to jump from asking questions to actually creating? The Zemith AI suite brings all the creative tools you need under one roof. You can brainstorm, get image analysis, and animate your photos without having to switch between a bunch of different apps. See what you can build at .
Explore Zemith Features
Every top AI. One subscription.
ChatGPT, Claude, Gemini, DeepSeek, Grok & 25+ more


Always on, real-time AI.
Voice + screen share · instant answers
What's the best way to learn a new language?
Immersion and spaced repetition work best. Try consuming media in your target language daily.
Voice + screen share · AI answers in real time
Image Generation
Flux, Nano Banana, Ideogram, Recraft + more
Write at the speed of thought.
AI autocomplete, rewrite & expand on command
Any document. Any format.
PDF, URL, or YouTube → chat, quiz, podcast & more
Video Creation
Veo, Kling, Grok Imagine and more

Text to Speech
Natural AI voices, 30+ languages
Code Generation
Write, debug & explain code
Chat with Documents
Upload PDFs, analyze content
Your AI, in your pocket.
Full access on iOS & Android · synced everywhere
Your infinite AI canvas.
Chat, image, video & motion tools — side by side
Save hours of work and research
Transparent, High-Value Pricing
Trusted by teams at
Free
No credit card required
- 100 credits daily
- 3 AI models to try
- Basic AI chat
Plus
- 1,000,000 credits/month
- 25+ AI models — GPT, Claude, Gemini, Grok & more
- Agent Mode with web search, computer tools and more
- Creative Studio: image generation and video generation
- Project Library: chat with document, website and youtube, podcast generation, flashcards, reports and more
- Workflow Studio and FocusOS
Professional
- Everything in Plus, and:
- 2,100,000 credits/month
- Pro-exclusive models (Claude Opus, Grok 4, Sonar Pro)
- Motion Tools & Max Mode
- First access to latest features
- Access to additional offers
What Our Users Say
Great Tool after 2 months usage
"I love the way multiple tools they integrated in one platform. Going in the right direction."
— simplyzubair
Best in Kind!
"The quality of data and sheer speed of responses is outstanding. I use this app every day."
— barefootmedicine
Simply awesome
"The credit system is fair, models are perfect, and the discord is very responsive. Quite awesome."
— MarianZ
Great for Document Analysis
"Just works. Simple to use and great for working with documents. Money well spent."
— yerch82
Great AI site with accessible LLMs
"The organization of features is better than all the other sites — even better than ChatGPT."
— sumore
Excellent Tool
"It lives up to the all-in-one claim. All the necessary functions with a well-designed, easy UI."
— AlphaLeaf
Well-rounded platform with solid LLMs
"The team clearly puts their heart and soul into this platform. Really solid extra functionality."
— SlothMachine
Best AI tool I've ever used
"Updates made almost daily, feedback is incredibly fast. Just look at the changelogs — consistency."
— reu0691